Pest-Infested Trees: A Guide to Safe Removal in Indiana

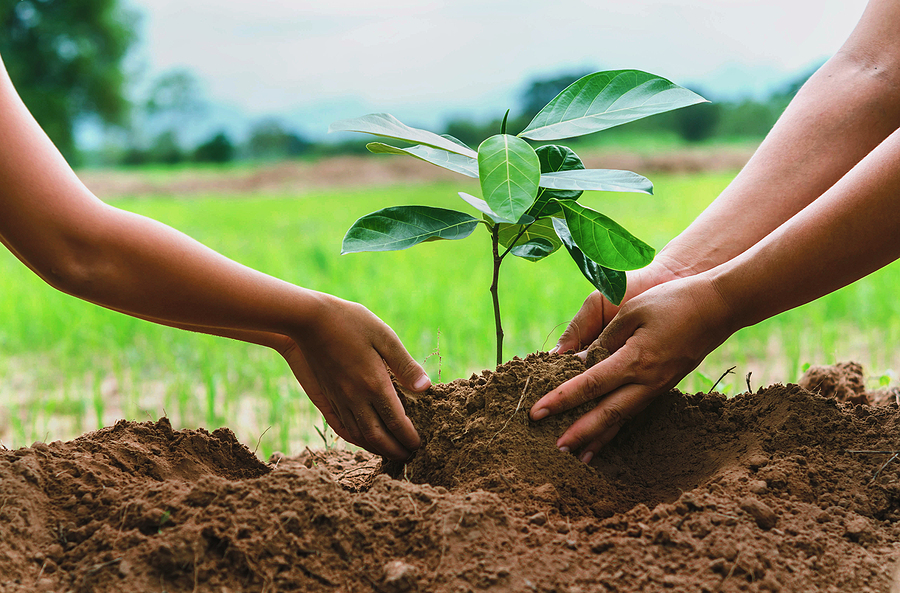
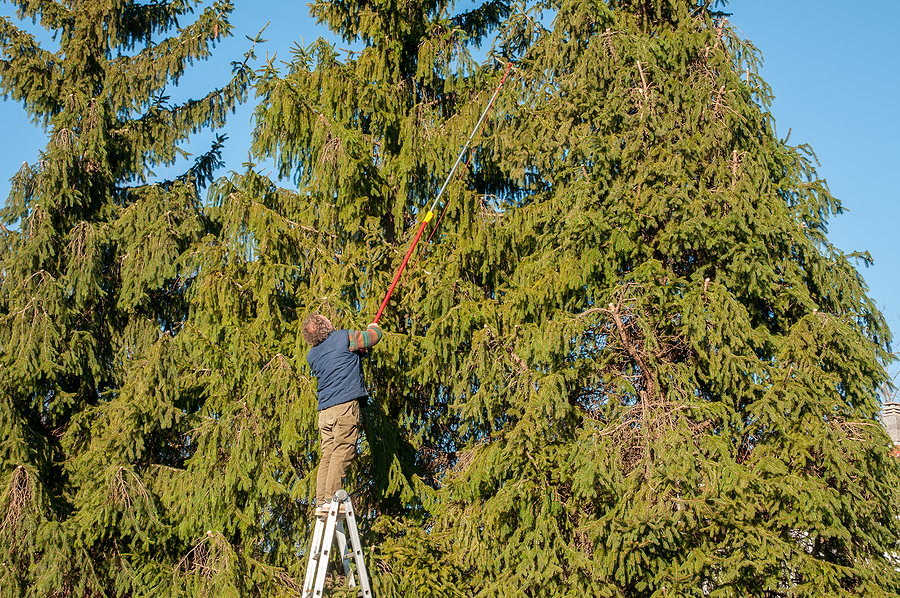
A towering oak or sprawling ash can bring immense beauty and shade to your Indianapolis property. But when invasive insects or diseases move in, that same beloved tree can quickly become a significant liability. Pest-infested trees often deteriorate silently from the inside out, weakening the trunk and branches before you even notice a problem.

Ignoring a pest problem isn’t just an aesthetic issue; it is a condition that can cause long-term damage to your entire landscape. Pests can spread rapidly from one sick tree to surrounding healthy ones, multiplying the destruction. Furthermore, a weakened tree poses a serious fall risk during heavy Indiana storms, threatening your home, vehicles, and personal safety.

Catching an infestation early and taking decisive action can mean the difference between saving a localized problem and losing an entire canopy. This guide will walk you through the common pests threatening Indiana trees, how to spot the warning signs, and why professional removal is the safest route to protect your property.

Call 317-348-0811 for Pest-Infested Tree Removal in Indianapolis

Identifying the Culprits: Common Tree Pests

Different pests attack trees in unique ways, but their goal is the same: draining the tree of essential nutrients. Knowing what you are up against is the first step in defending your landscape.

Beetles: Emerald Ash Borers and Bark Beetles

The Emerald Ash Borer (EAB) is a devastating invasive species that has wiped out millions of ash trees across Indiana. EAB larvae bore into the inner bark, disrupting the tree’s ability to transport water and nutrients. Similarly, native and invasive bark beetles girdle trees, starving them of essential resources.

Aphids: Tiny Sap-Suckers, Big Problems

While they are small, aphids reproduce rapidly and gather in massive numbers. They feed by piercing plant tissues and sucking out sap. This process not only stunts the tree’s growth but also leaves behind a sticky substance called honeydew, which attracts other pests and promotes mold growth.

Moths: Gypsy Moths and Tent Caterpillars

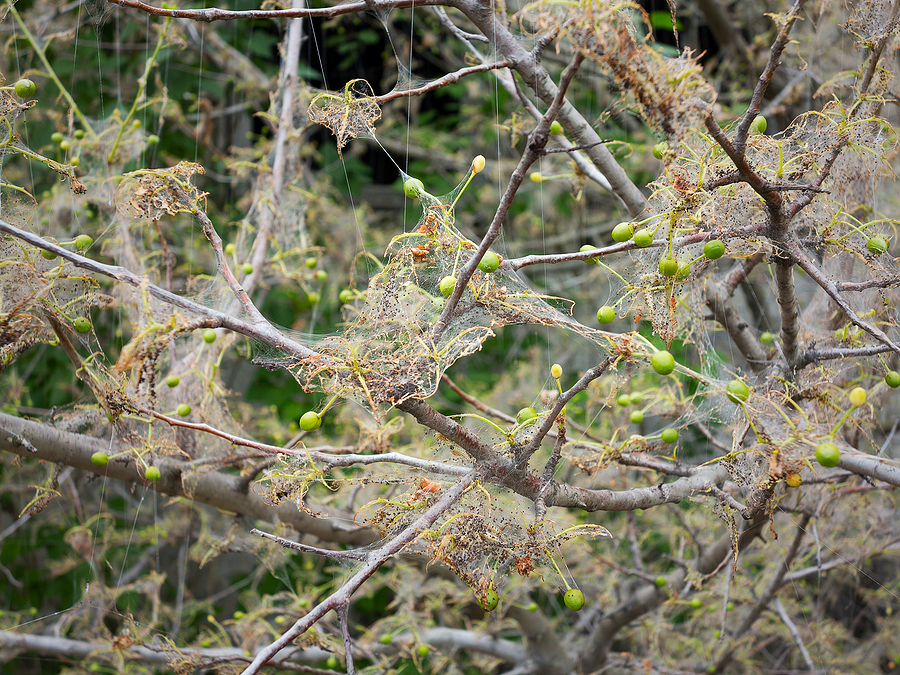
Gypsy moths and tent caterpillars are notorious for defoliating trees. When caterpillar populations explode, they can strip a tree of its leaves in a matter of days. Repeated defoliation weakens the tree over time, making it highly susceptible to secondary infections or fatal decline.

Fungi and Diseases: Beyond Insect Pests

Pests often open the door for severe plant diseases. When insects bore into wood or chew on leaves, they create wounds where harmful fungi can enter. In Indiana, diseases like Hypoxylon canker or root rot frequently finish the job that insects started, leading to rapid tree death.

Signs Your Tree Has Pests

Diagnosing a pest problem requires a careful eye. Look for these common symptoms to catch an infestation before it spirals out of control.

Visible Damage: Holes, Tunnels, and Discoloration

Inspect the trunk and major branches closely. EAB infestations often leave D-shaped exit holes, while bark beetles leave tiny round holes. You might also spot vertical bark splits or meandering, S-shaped tunnels underneath the bark layers.

Leaf Changes: Wilting, Yellowing, or Stunted Growth

Leaves are excellent indicators of tree health. If a tree’s canopy shows crown thinning, premature yellowing, or sudden wilting during the summer, it is struggling to pull nutrients from its root system. Branches at the very top of the crown dying first is a classic sign of an ash borer attack.

Bark Anomalies: Peeling, Cracks, or Sawdust

When insects bore into wood, they push out fine, powdery sawdust known as frass. Finding small piles of frass at the base of the tree or caught in bark crevices is a major red flag. Bark that is actively peeling or cracking away from the trunk also indicates dead tissue beneath.

Presence of Insects or Their Larvae

Sometimes, the pests show themselves. You may spot caterpillars nesting in branch crotches, adult beetles crawling along the trunk, or clusters of aphids on the undersides of leaves. Seeing the pests directly means an infestation is actively underway.

The Dangers of Neglecting Infested Trees

Leaving a dying, infested tree in your yard is a gamble. The consequences extend far beyond a single dead plant.

Spreading Infestations to Healthy Trees

Insects do not stay confined to one host. Once a tree becomes too crowded or dies entirely, pests will migrate to the nearest healthy trees on your property. Removing a highly infested tree promptly acts as a firewall, protecting the rest of your landscape.

Structural Weakness and Safety Hazards

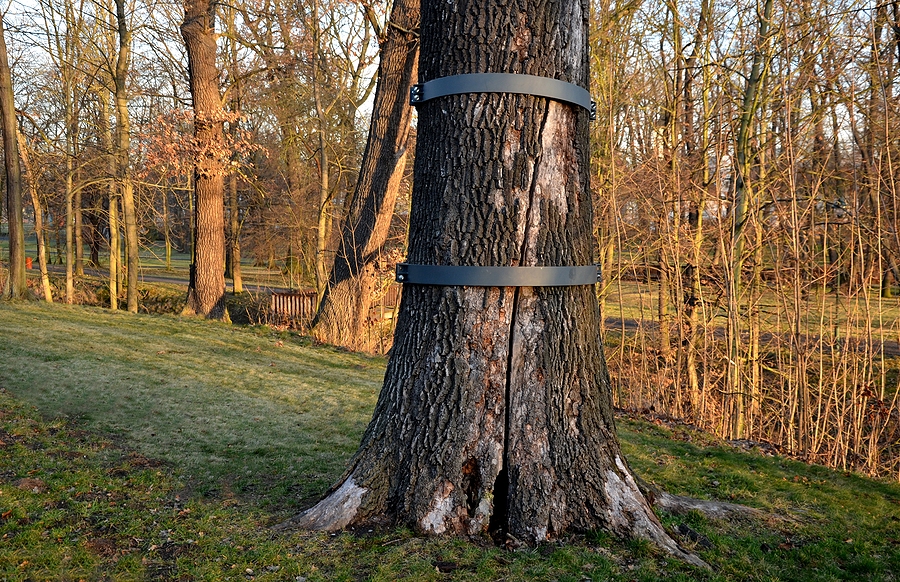
As borers and fungi eat away at wood fibers, the tree loses its structural integrity. Dead branches can snap and fall without warning. A hollowed-out trunk is incredibly vulnerable to high winds, making it a severe safety hazard for your family and neighbors.

Property Damage Risks

A falling tree or heavy branch can easily crush roofs, shatter windows, or destroy fences. The cost of repairing severe property damage far exceeds the price of proactive tree management.

Economic Impact on Your Landscape

Mature trees add significant value to your property. Losing a large portion of your canopy due to a spreading pest infestation can lower your property value and curb appeal, not to mention the steep costs associated with emergency storm damage repairs.

Why DIY Tree Removal is Not Recommended

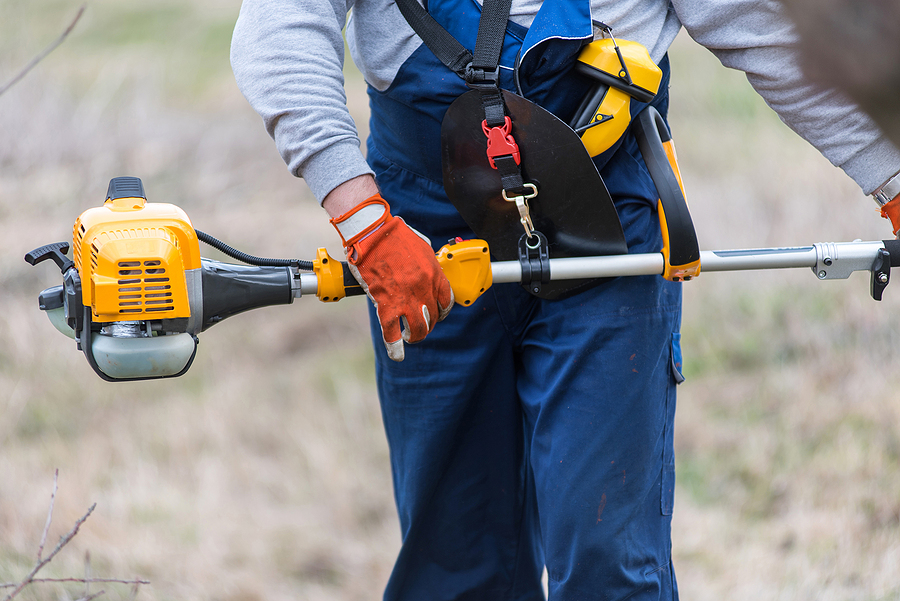
When a tree is dead or dying, grabbing a chainsaw might seem like a quick fix. However, taking down a compromised tree is highly unpredictable and dangerous.

Risks to Personal Safety

Infested trees are structurally unstable. They do not behave like healthy wood when cut. Branches can snap unexpectedly, and trunks can barber-chair (split vertically) during a cut, leading to catastrophic injuries.

Incomplete Removal and Re-infestation

Cutting a tree down is only half the battle. If you leave the stump or fail to dispose of the debris correctly, the pests will simply emerge from the leftover wood and infect surrounding plants.

Lack of Specialized Equipment and Expertise

Safely dismantling a large tree in a residential area requires bucket trucks, rigging gear, and heavy-duty chippers. A professional tree removal service knows how to calculate weight distribution and use ropes to lower heavy limbs safely without damaging the property below.

Environmental and Legal Considerations

Indianapolis and the state of Indiana have strict regulations regarding tree removal and wood disposal. For example, moving infested firewood is highly restricted to prevent the spread of pests like the Emerald Ash Borer. Professionals understand local permit requirements and adhere to safe, legal disposal methods.

The Professional Approach to Pest-Infested Tree Removal

Hiring a certified tree service ensures the problem is handled safely, legally, and completely.

Expert Assessment and Diagnosis

A professional arborist will properly identify the pest involved. They can determine whether the tree is salvageable through treatments or if immediate removal is necessary to protect public safety.

Safe and Efficient Removal Techniques

Trained crews use industry-standard rigging and cutting techniques to take down the tree section by section. This controlled process eliminates the risk to your home, power lines, and landscaping.

Proper Disposal to Prevent Spread

Professionals will chip the brush and transport the infested wood to designated disposal sites. This ensures that the insects or fungi are destroyed and cannot migrate to new locations.

Preventing Future Infestations

After removal, an expert can provide guidance on protecting your remaining trees. They may suggest preventative soil injections, trunk sprays, or planting disease-resistant tree varieties in the future.

Frequently Asked Questions (FAQs)

How do I know if my tree has pests?

Look for canopy dieback, yellowing leaves, small holes in the bark, peeling bark, or sawdust-like frass near the base of the trunk.

Can I save a pest-infested tree?

In some cases, early-stage infestations can be treated with professional insecticides or fungicides. However, if the tree has lost more than 30% to 50% of its canopy, removal is usually the only viable option.

What does professional tree removal involve?

It involves an initial assessment, securing the work zone, carefully dismantling the tree using ropes and specialized equipment, grinding the stump, and safely hauling away the infested debris.

How much does pest-infested tree removal cost?

Costs vary based on the tree’s size, location, and the complexity of the removal. Hazardous trees that are structurally compromised often require specialized equipment, which can factor into the final price.

How can I protect my other trees?

Keep your trees healthy with proper watering and mulching. Have a professional arborist inspect your property annually and apply preventative treatments if invasive pests are active in your area.

Protect Your Landscape from Tree Pests

A pest infestation isn’t just a localized nuisance; it’s a severe threat to the health and safety of your entire property. Recognizing the signs of an attack early on gives you the best chance to mitigate the damage. When a tree is too far gone, trusting the removal to experts is the only way to ensure the job is done safely and responsibly.

If you suspect you have a sick or dying tree on your property, do not wait until the next major storm hits. Protect your home and landscape today. Request a free quote for professional tree removal in Indianapolis, Indiana today.

Call to Book Service

Related Post: Common Indiana Tree Pests and How to Manage Them Safely

The Best Shade Trees to Cool Your Indiana Landscape

Summer sunshine feels incredible, but an unshaded home can quickly become uncomfortably warm and expensive to cool. Planting a shade tree is a long-term investment in your property that offers profound benefits. A well-placed tree can significantly lower your air conditioning bills, provide a comfortable outdoor gathering space, and elevate the overall beauty of your yard.

However, a tree is not just a temporary addition to your garden; it is a living structure that will likely outlast us all. Choosing the wrong species for your specific soil type or available space can lead to a host of problems, from invasive root systems to hazardous falling branches.

Selecting the right tree requires careful thought about your local environment and your long-term landscaping goals. The Midwest presents a unique set of weather patterns, soil conditions, and potential pests. You need a species that can thrive through heavy spring rains, hot summers, and freezing winters.

This guide will walk you through the top shade trees perfectly suited for Indiana. We will cover native species, adaptable alternatives, and the essential care techniques required to keep your trees healthy and strong for generations.

Best Indiana Shade Trees

Key Considerations for Choosing Shade Trees in Indiana

Before you head to the nursery, you need to assess your planting site. A poorly planned planting project often results in placing the wrong tree in the wrong place.

Indiana’s Climate and Soil

Indiana generally falls into USDA Hardiness Zones 5 and 6. This means any tree you plant must tolerate cold winter temperatures and humid summer heat. Soil quality is equally critical. You must determine if your soil is mostly clay, loam, or sand, as well as its drainage capabilities. Many Indiana yards feature heavy clay soils that hold water, which can suffocate the roots of trees that require well-drained conditions.

Growth Rate and Mature Size

We all want a shady yard as quickly as possible, but fast-growing trees often produce weaker wood that is susceptible to storm damage. You must also consider the tree’s mature size. Will the canopy eventually interfere with overhead utility lines? Are there underground pipes that extending roots might disrupt? Ensure your chosen planting site has enough room to accommodate the tree at its full height and spread.

Pest and Disease Resistance

Indiana trees face various threats from local pests and diseases. The Emerald Ash Borer, for example, has devastated ash populations across the state, making them a poor choice for new plantings. Other common issues include scale insects, gypsy moths, and fungal infections like anthracnose. Selecting species known for their resistance to these common ailments will save you time, money, and heartache down the road.

Maintenance Requirements

Every tree requires some level of care, but some demand more than others. Consider whether you are prepared to rake large leaves, clean up fallen seed pods, or manage dropped fruit. Some species also require frequent pruning to maintain a safe, structurally sound canopy.

Top Shade Trees for Indiana Landscapes

With your site assessment complete, you can begin selecting the perfect species. Here are the top shade trees that thrive in Indiana’s unique environment.

Native Indiana Shade Trees

Native trees are naturally adapted to the local climate and soil, making them highly resilient and beneficial to local wildlife.

Red Maple (Acer rubrum)

The Red Maple is a spectacular choice for a shade tree. It is highly adaptable and can handle urban pollution well. If you have an area of your yard that stays relatively wet, the Red Maple will thrive there, rewarding you with stunning, bright red foliage in the autumn.

Sugar Maple (Acer saccharum)

Famous for its brilliant fall colors of yellow, orange, and red, the Sugar Maple is one of the most beloved trees in the Midwest. It is quite shade-tolerant in its youth but prefers reasonably fertile, well-drained soil. Keep in mind that Sugar Maples perform poorly in compacted soils and are sensitive to road salt, making them better suited for backyards than curbsides.

Tulip Tree (Liriodendron tulipifera)

As the state tree of Indiana, the Tulip Tree (or tulip-poplar) is a fast-growing giant that can reach heights of 70 to 90 feet. It features unique, tulip-shaped leaves and beautiful yellow-green spring flowers. It prefers acidic, moist, well-drained soil and needs plenty of room to grow. Because it grows quickly, its wood is slightly weaker, making it susceptible to ice damage during severe winter storms.

Burr Oak (Quercus macrocarpa)

If you want a tree that signifies strength and endurance, the Burr Oak is an exceptional choice. This massive, slow-growing oak can live for centuries. It adapts incredibly well to a wide range of soil conditions, including alkaline and heavy clay soils. Its wide-spreading canopy provides dense shade, and its acorns offer a valuable food source for local wildlife.

American Sycamore (Platanus occidentalis)

The American Sycamore is easily recognized by its distinctive, peeling bark that reveals patches of white, gray, and green. This is a very large, fast-growing tree that loves moisture, making it a great choice for low-lying areas or near water features. Due to its massive mature size and tendency to drop leaves and twigs, it is best reserved for expansive properties.

Non-Native, Adaptable Shade Trees

While native trees are excellent, several highly adaptable non-native or cultivated species also perform beautifully in Indiana.

Kentucky Coffeetree (Gymnocladus dioicus)

Despite the name, this tree is highly adaptable to Indiana landscapes. It is incredibly tough, tolerating drought, poor soils, and urban pollution. It provides excellent, dappled shade that allows turfgrass to grow beneath it. The male varieties are completely seedless, making them a low-maintenance option for busy homeowners.

American Elm (Ulmus americana ‘Princeton’ or ‘Valley Forge’)

Dutch Elm Disease once decimated the American Elm population, but disease-resistant cultivars like ‘Princeton’ and ‘Valley Forge’ have brought this classic shade tree back to our streets. They feature a beautiful, vase-shaped canopy that arches elegantly over driveways and lawns, growing relatively quickly to provide substantial shade.

Ginkgo (Ginkgo biloba)

The Ginkgo is a living fossil with unique, fan-shaped leaves that turn a brilliant, uniform yellow in the fall. It is virtually pest-free and highly tolerant of compacted soils and city pollution. Always ensure you purchase a male tree, as the female Ginkgo produces fruit that drops and emits an incredibly foul odor.

Planting and Caring for Your New Shade Tree

Proper installation and ongoing care are crucial to ensuring your new shade tree reaches its full potential.

Proper Planting Techniques

Dig a planting hole that is two to three times wider than the tree’s root ball, but no deeper. The root flare—the area where the trunk expands at the base—should sit just above the soil line. Planting a tree too deeply is a leading cause of premature decline. Once planted, apply a two-to-three-inch layer of organic mulch around the base to retain moisture and regulate soil temperature. Keep the mulch pulled a few inches away from the trunk to prevent rot.

Watering and Fertilization

Newly planted trees require consistent moisture to establish their root systems. Water deeply once or twice a week, depending on rainfall, rather than giving the tree frequent, shallow sprinklings. Most trees planted in typical residential lawns do not require supplemental fertilization, as they absorb the nutrients applied to the surrounding grass. If your tree shows signs of nutrient deficiency, consult an arborist before applying heavy fertilizers.

Pruning for Health and Structure

Routine tree pruning removes dead, diseased, or crossing branches, allowing the tree to develop a strong, central leader. It is best to prune shade trees during their dormant season in late winter or early spring. Avoid removing more than 25 percent of a tree’s canopy in a single year, as this can severely stress the plant.

Frequently Asked Questions about Indiana Shade Trees

How fast do these trees grow?

Growth rates vary significantly by species and site conditions. Tulip Trees and American Sycamores are considered fast growers, often adding two or more feet of height per year. Sugar Maples and Burr Oaks are moderate to slow growers, taking their time to develop dense, strong wood.

When is the best time to plant a shade tree?

In Indiana, the ideal times to plant are early spring (after the ground thaws but before trees leaf out) and early fall. Planting during these cooler, wetter months allows roots to establish without the stress of scorching summer heat.

Do I need to fertilize my shade tree?

In most cases, established shade trees do not require fertilization if they are growing in a healthy yard. If you notice slow growth, unusually small leaves, or early fall coloring, it is wise to test your soil to identify any specific nutrient deficiencies before adding fertilizer.

Enjoying the Benefits of a Shady Indiana Yard

Selecting, planting, and nurturing a shade tree is a deeply rewarding experience. By choosing species tailored to Indiana’s specific climate and soil conditions, you protect your property from extreme heat while enhancing your local ecosystem. Whether you prefer the fiery autumn display of a Red Maple or the towering majesty of a Burr Oak, the right tree will provide beauty, comfort, and memories for decades to come.

If you have existing trees that need attention or require assistance preparing a site for a new addition, professional help is invaluable. For expert tree service in Indianapolis, Indiana, our team is ready to assist. We specialize in pruning, trimming, tree removal, stump removal, and comprehensive plant health care. Get a free quote today and ensure your landscape thrives season after season.

Call Now

Related Post: Tree Species That Can Withstand Flooding in Indiana

Why Are Your Indiana Pine Trees Losing Needles?

Pine trees bring year-round color and life to Indiana landscapes. Their vibrant green foliage provides a beautiful contrast to our snowy winters and offers excellent privacy and windbreaks. Seeing your cherished evergreens suddenly drop their needles can be deeply concerning.

Needle loss often serves as an early warning sign that a tree is under stress. Sometimes, this shedding is a harmless, natural process. Other times, it points to a serious underlying issue requiring immediate attention. Recognizing the difference early on can save your tree and protect the surrounding landscape.

This guide explores the various culprits behind pine needle loss in Indiana. We will examine natural cycles, environmental stressors, pests, and diseases so you can accurately identify what is happening to your trees.

Diagnose Pine Needle Loss in Indiana

The Natural Cycle of Pine Needles

Evergreens do not keep the same needles forever. Like deciduous trees, pines shed old foliage to make room for new growth.

How long do pine needles last?

A single pine needle typically lives for two to five years, depending on the exact species of the tree. White pines generally hold their needles for about two to three years. Other varieties, like the Austrian pine, might keep theirs for up to four years. Once a needle reaches the end of its natural lifespan, the tree sheds it.

What is normal needle shedding?

Natural shedding usually happens in late summer or early fall. You will notice the innermost needles closest to the trunk turning yellow or brown before dropping to the ground. The needles at the tips of the branches should remain green and healthy. If the shedding is confined to the older, inner foliage, your tree is simply going through its normal seasonal cycle.

Common Environmental Stressors

Trees are highly sensitive to their surroundings. Indiana’s changing weather patterns and distinct soil types can place significant stress on your pines.

Drought and water stress

Extended dry spells deprive pine roots of essential moisture. Without enough water, needles will turn yellow or brown and drop prematurely. Young or newly planted pines are especially vulnerable to drought and require supplemental watering during dry summer months.

Extreme temperature fluctuations

Rapid temperature drops and harsh winter winds pull moisture from pine needles faster than the frozen roots can replace it. This condition, often called winter burn, causes the tips of the needles to turn brown by early spring.

Soil compaction and poor drainage

Indiana is known for its heavy clay soils. Clay retains water tightly and drains very slowly. If pine trees are planted in low-lying areas, excess water can suffocate the root system. As the roots drown, they fail to deliver oxygen and nutrients to the canopy, resulting in widespread needle drop.

Pests That Target Indiana Pines

Several insects feed on pine trees, damaging the foliage and causing the needles to fall away.

Pine needle scale

These tiny pests appear as small, whitish bumps measuring about 1/10 of an inch long with a slight yellow spot. As they multiply, they suck the sap out of the needles. A heavy infestation of pine needle scale will cause entire needles to turn yellow or brown before dropping off completely.

Zimmerman pine moth

The Zimmerman pine moth has a one-year life cycle, surviving the winter as a young caterpillar hiding under bark scales. As the caterpillars bore into the tree, they create cankers that cut off the flow of nutrients. This damage causes the tops of affected trees to turn yellow and eventually die.

Sawflies

Sawfly larvae look like small caterpillars and feed in large, tightly packed groups. Spring sawfly species typically consume old pine needles, while summer species eat the current year’s growth. They can rapidly strip a branch bare, severely weakening the tree and causing noticeable defoliation.

Aphids

Pine aphids extract vital fluids from the tree. Heavy aphid feeding produces needle discoloration, physical deformation, and premature needle drop. These pests also secrete a sticky substance called honeydew, which encourages the growth of black sooty mold on the remaining foliage.

Fungal Diseases Affecting Pine Trees

Fungal infections thrive in wet, humid conditions. Indiana’s spring weather often creates the perfect environment for these diseases to spread.

Diplodia tip blight

Diplodia tip blight primarily affects older, mature pines. This aggressive fungus targets the new growth, shriveling and killing the buds and tips of the branches. Over time, the disease moves down the branch, resulting in significant dieback.

Dothistroma needle blight

Unlike tip blight, Dothistroma needle blight creates distinct reddish-brown bands that completely girdle the needle. The tip of the needle eventually turns tan. By the end of the growing season, the entire infected needle will turn brown and drop from the branch.

Pine wilt disease

Pine wilt is a devastating disease caused by microscopic nematodes spread by the pine sawyer beetle. The disease spreads incredibly rapidly inside the tree. Within just a few short weeks, the entire pine tree may show symptoms of severe wilt and total browning, typically leading to the tree’s death.

Other Factors Contributing to Needle Loss

Sometimes, human activity or soil composition is the root cause of declining evergreen health.

Nutrient deficiencies

Pines require specific soil conditions to thrive. If the soil pH is too high, the tree may struggle to absorb iron, leading to iron chlorosis. This deficiency causes the needles to turn a pale yellow green while the veins remain darker.

Herbicide damage

Chemicals used to kill broadleaf weeds in nearby lawns can easily drift on the wind or wash into the tree’s root zone. Exposure to these herbicides causes needles to twist, curl, or drop entirely.

Root damage

Construction projects, heavy machinery, or even aggressive lawn mowing can severely damage a pine tree’s root system. Injured roots cannot support the heavy canopy above, causing the tree to shed needles in an attempt to conserve energy and water.

When to Call a Professional Arborist

Attempting to diagnose a sick tree on your own can be challenging. Many pests, diseases, and environmental stressors share similar symptoms. If you notice needles turning brown at the tips of the branches, rapid overall yellowing, or severe dieback in the upper canopy, it is time to consult an expert. An arborist can accurately identify the problem and recommend a safe, effective treatment plan, while a reputable tree service company can remove a dead or dying pine tree.

Frequently Asked Questions

Can pine needles grow back?

Needles that have turned completely brown and fallen off will not grow back on that specific part of the branch. However, if the tree is healthy and the buds are still intact, new needles will emerge from the tips of the branches during the next growing season.

How can I prevent pine needle loss?

Proper watering during dry spells, applying a layer of organic mulch to retain soil moisture, and ensuring adequate drainage are the best preventative measures. Regularly inspecting your trees for early signs of pests or fungal spots will also help you stop problems before they cause severe needle drop.

Is it normal for pine trees to lose needles in the fall?

Yes. It is entirely normal for pine trees to drop their oldest, innermost needles in late summer or autumn. As long as the needles at the ends of the branches stay green and healthy, the tree is fine.

What are the signs of a dying pine tree?

Warning signs include widespread browning starting from the top down, bark peeling away from the trunk, significant sap weeping from large holes, and brittle branches that snap easily when bent.

Protecting Your Indiana Pines

Pine needle loss can stem from a variety of sources, ranging from natural seasonal shedding to aggressive pests and lethal fungal blights. Catching these issues early greatly improves the chances of saving your evergreens. By paying close attention to your tree’s watering needs and monitoring the foliage for abnormalities, you can keep your landscape vibrant and healthy.

For expert routine tree service and tree removal in Indianapolis, request a free estimate today.

Call to Now to Book Service

Related Post: Why Do Trees Shed Their Leaves? An Exploration of Seasonal Leaf Loss

National Gardening Day: Your Guide to Planting Trees

Spring brings a fresh opportunity to get outside, dig in the dirt, and improve your landscape. April 14 marks National Gardening Day, a time dedicated to celebrating the joys of horticulture. While many people focus on flowers or vegetable patches, planting a tree is one of the most impactful ways to celebrate the season.

A newly planted sapling provides years of beauty, shade, and habitat for local wildlife. It also helps clean the air, reduce stormwater runoff, and increase your property value. However, getting a tree established requires more than simply digging a hole and walking away.

Setting your new plant up for success requires careful planning, proper planting techniques, and diligent aftercare. This guide will walk you through the essential steps to ensure your new addition thrives for generations to come.

National Gardening Day is April 14th!

Choosing the Right Tree for Your Space

Selecting the perfect tree requires you to evaluate your environment. A mismatch between a tree’s needs and your yard’s conditions will lead to poor growth or early decline.

Assessing Your Landscape

Start by looking up and looking down. Consider the mature size of the species you want to plant. A cute sapling can quickly grow into a massive structure that interferes with overhead power lines or crowds your home’s foundation. Choose a variety that fits the physical boundaries of your property when fully grown.

You also need to evaluate your soil type and drainage. Homeowners in places like Indianapolis often deal with heavy clay soils that drain poorly. Some species thrive in wet conditions, while others will succumb to root rot if left in standing water. Finally, track your sunlight exposure. Determine if your planting site receives full sun, partial shade, or full shade, and buy a tree that matches those light levels.

Native vs. Non-Native Species

Whenever possible, prioritize native plants. Native tree species evolved in your specific climate and are naturally adapted to the local soil and weather patterns. They require less fertilizer, tolerate local pests better, and provide crucial food sources for native birds and insects. In Indiana, excellent native options include the flowering dogwood, eastern redbud, serviceberry, and pawpaw.

Step-by-Step Tree Planting Guide

Once you bring your new plant home, proper installation is critical. Follow these steps to give the root system a healthy start.

Preparing the Planting Site

Clear the area of weeds, turfgrass, and debris. You want a clean slate so the new roots do not have to compete for water and nutrients. Mark out a circle that is at least two to three times wider than the root ball.

Digging the Hole Correctly

The most important rule of digging is to make the hole wide, but not deep. Dig a broad, saucer-shaped hole. The depth should exactly match the distance from the bottom of the root ball to the root flare. The root flare is the swollen area where the main stem transitions into the root system. You may need to pull back some soil from the top of your nursery pot to find this flare.

Placing the Tree

Carefully remove the tree from its container. If the roots are circling tightly around the root ball, gently tease them apart or make a few shallow vertical cuts to encourage outward growth. Place the root ball in the center of the hole. Lay a shovel handle across the hole to verify that the root flare sits slightly above the surrounding soil level.

Backfilling and Watering

Fill the hole with the original soil you removed. Do not add heavy amendments or potting soil, as this discourages the roots from expanding into the surrounding earth. Tamp the soil down lightly to remove large air pockets, but avoid packing it too tightly. Water the area thoroughly to settle the soil around the roots.

Post-Planting Care for Optimal Growth

The work does not end once the soil is leveled. The first two years are a critical establishment period.

Initial Watering Schedule

Consistent moisture is vital. Apply one to two gallons of water per inch of the tree’s trunk diameter. For the first 3 to 12 weeks, water every two to three days. After that period, transition to a weekly watering schedule until the root system is fully established. Check the soil moisture frequently during hot, dry spells.

Mulching Techniques

Apply a two-to-three-inch layer of organic mulch around the base of the plant. Mulch helps retain soil moisture, regulates temperature, and keeps weeds at bay. Keep the mulch pulled back a few inches from the actual trunk. Piling mulch against the bark creates a “mulch volcano,” which leads to decay and invites tree pests.

Protecting Young Trees

Young bark is highly susceptible to damage from lawnmowers, string trimmers, and hungry wildlife. Consider installing a protective plastic trunk guard or creating a small fence around the base until the bark thickens and matures.

Common Tree Planting Mistakes to Avoid

Even well-intentioned gardeners occasionally make errors. Watch out for these common pitfalls.

Planting Too Deep or Too Shallow

Burying the root flare starves the roots of oxygen and causes the lower trunk to rot. Conversely, planting too high exposes delicate roots to the harsh sun and freezing temperatures. Always keep that root flare visible right at the soil line.

Insufficient Watering

Relying solely on rainfall is a gamble. Newly planted saplings have a limited root system and dry out quickly. Establish a strict watering routine and adjust it based on your local weather patterns.

Improper Pruning at Planting

Resist the urge to heavily prune a new arrival. The plant needs all its leaves to generate energy for root growth. Only remove branches that are dead, damaged, or severely crossing. Leave structural pruning for a few years down the road.

Frequently Asked Questions

When is the best time to plant a tree?

Early spring and early fall are the optimal seasons. The cooler temperatures and abundant rainfall help the roots establish before the stress of extreme summer heat or freezing winter temperatures.

How often should I water a newly planted tree?

Water every two to three days for the first few months, supplying about one to two gallons per inch of trunk diameter. Gradually reduce the frequency to once a week, ensuring the soil stays moist but not soggy.

What is the benefit of mulching around trees?

Mulch acts as an insulating blanket. It conserves water, prevents weed growth, and slowly breaks down to provide organic matter to the soil.

Secure Your Landscape’s Future

Adding a new sapling to your yard is a wonderful way to honor National Gardening Day. By choosing the right species, executing proper planting techniques, and providing consistent aftercare, you ensure your landscape continues to thrive.

If you need professional assistance maintaining your property’s canopy, we are here to help. Reach out to our team for affordable routine tree service in Indianapolis. We handle everything from expert trimming and pruning to safe tree removal, keeping your yard beautiful and safe all year long.

Call for a Free Estimate

Related Post: Digging Deep into Green Living with Backyard Tree Planting

A Complete Guide to Ornamental Tree Care in Indiana

Spring in Indiana brings a magnificent display of blooming flowers and budding leaves. Beautiful dogwoods and redbuds transform ordinary yards into stunning landscapes. These trees add immense value to your property and provide essential habitats for local birds and pollinators.

Growing healthy trees in the Midwest requires careful attention to the local environment. Indiana gardeners face extreme temperature swings, humid summers, and heavy, compacted clay soils. A young sapling might struggle to survive its first winter without the right preparation and care.

Understanding how to nurture these plants will help you maintain a vibrant, healthy yard year-round. This guide provides actionable steps to select, plant, and maintain beautiful trees that will thrive in your specific climate.

Call 317-348-0811 for Professional Ornamental Tree Care in Indianapolis Indiana

Choosing the Right Ornamental Trees for Indiana

The best ornamental trees for Indiana landscapes balance visual appeal with the ability to withstand local climate swings and heavy clay soils.

Native Species vs. Non-Native

Selecting the right species greatly impacts the long-term health of your yard. Native trees naturally adapted to the Midwest require less maintenance and suffer from fewer disease issues. Eastern Redbuds, Flowering Dogwoods, and Serviceberries are excellent native choices. They offer beautiful spring flowers and support the local ecosystem.

Non-native species can also look spectacular. Japanese Maples and ornamental Lilac trees provide unique foliage and vibrant colors. However, these exotic varieties often demand highly specific soil conditions and extra protection from harsh winter winds.

Considerations for Indiana’s Climate and Soil

Most of Indiana falls into USDA Hardiness Zones 5b and 6b. This means your plants must survive freezing winter temperatures and hot, humid summers. Always check the hardiness zone of a tree before bringing it home from the nursery.

Soil type presents another major hurdle. Much of Indiana features dense clay soil that holds water tightly. This poor drainage quickly leads to root rot in sensitive plants. You can improve drainage by mixing organic compost into your planting site or by planting your trees on a slight mound.

Essential Care Practices for Ornamental Trees

Proper care begins with a solid foundation of correct planting depth, consistent watering, and proactive pest monitoring.

Proper Planting Techniques

Planting a tree correctly gives it the best chance at a long, healthy life. Dig a hole twice as wide as the root ball, but keep the depth exactly the same. The root flare—the wide base where the trunk meets the roots—must remain visible above the soil line. Burying the root flare suffocates the tree and invites moisture-related tree diseases.

Watering and Fertilization Schedules

Young trees need consistent moisture to establish strong root systems. Water newly planted trees deeply once a week, providing about an inch of water. During prolonged dry spells in July and August, you may need to water twice a week.

Fertilization should occur in early spring before new growth begins. Apply a slow-release, granular fertilizer around the drip line of the branches. Avoid fertilizing late in the summer, as this encourages tender new growth that easily takes damage during early winter freezes.

Pest and Disease Management

Indiana trees face threats from various insects and fungal infections. Bagworms commonly attack evergreens, creating small, cone-like bags hanging from the branches. Aphids and scale insects can drain sap from the leaves of flowering trees.

Fungal issues like apple scab or needlecast thrive in our humid spring weather. Inspect your leaves regularly for strange spots, discoloration, or sticky residue. Catching these problems early allows you to treat them effectively with horticultural oils or insecticidal soaps before serious damage occurs.

Pruning and Trimming for Optimal Health and Aesthetics

You should prune your ornamental trees during late winter or early spring while the tree is completely dormant.

When and How to Prune

Dormant tree pruning prevents excessive sap loss and drastically reduces the risk of spreading infectious diseases. Without leaves blocking your view, you can easily see the overall structure of the branches. Remove dead, diseased, or broken branches first. Next, look for branches that cross and rub against each other, as this friction creates open wounds in the bark.

Tools and Techniques

Using the right tools ensures clean cuts that heal quickly. Keep your bypass pruners and loppers sharp and sterilized. Clean your blades with rubbing alcohol between cuts if you suspect you are removing diseased wood. Always cut just outside the branch collar—the swollen area where the branch meets the trunk. Leaving a stub invites pests and rot.

Protecting Your Ornamental Trees Through Indiana Seasons

Guarding your trees against extreme temperature shifts involves strategic mulching in the summer and physical barriers in the winter.

Winter Protection Strategies

Young trees possess thin bark that easily cracks under the extreme temperature fluctuations of an Indiana winter. This condition, known as sunscald, damages the tissue underneath. Protect vulnerable trunks by wrapping them with commercial tree wrap in late autumn. Remove the wrap in early spring. For delicate evergreens facing harsh north winds, consider setting up a burlap screen to block the freezing gusts.

Summer Care Tips

Summer care heavily relies on proper mulching. Apply a two-to-three-inch layer of organic mulch around the base of the tree. Mulch retains soil moisture, suppresses weeds, and keeps the root zone cool during blistering August heat. Always keep the mulch pulled back a few inches from the actual trunk to prevent rot.

Common Challenges and Solutions for Indiana Ornamental Trees

Poor soil drainage and invasive pests represent the biggest hurdles for Indiana gardeners trying to grow healthy ornamentals. If you notice leaves turning yellow and dropping prematurely, your tree might be sitting in waterlogged soil. Address this by adjusting your watering schedule and aerating the soil around the drip line.

For severe pest outbreaks, such as the destructive Emerald Ash Borer or heavy scale infestations, contact a certified arborist to discuss professional treatment options.

Frequently Asked Questions

Homeowners often have similar concerns regarding tree placement, pruning limits, and disease prevention.

Can I plant a Japanese Maple in Indiana?

Yes. You can successfully grow Japanese Maples in Indiana. However, you must plant them in a location protected from harsh winter winds and intense, direct afternoon sun.

How much of a tree can I safely prune at once?

A general rule of thumb is to never remove more than 25% of a tree’s living canopy in a single year. Pruning too much at once stresses the plant and triggers rapid, weak branch growth.

When is the best time to plant a new tree?

Early fall is the ideal time to plant trees in the Midwest. The cooler air temperatures reduce stress on the foliage, while the warm soil encourages rapid root growth before winter arrives.

Nurturing Your Garden’s Crown Jewels

Caring for the trees in your yard requires patience, observation, and a willingness to learn. By selecting appropriate species, watering correctly, and pruning safely, you help these beautiful plants reach their full potential. A well-maintained tree will reward your efforts with decades of gorgeous spring blossoms, lush summer shade, and brilliant autumn colors.

If you need help managing the canopy in your yard, contact us for professional tree maintenance in Indianapolis. Our experienced team offers comprehensive services, including expert trimming, safe pruning, tree removal, and complete stump removal. Reach out today to schedule a consultation and give your landscape the professional care it deserves.

Call Now for a Free Quote

Related Post: How to Choose the Best Drought Tolerant Trees for Indiana Gardens

Ultimate Guide to Anti-Desiccant Tree Sprays

The sight of snow blanketing your yard can be beautiful, but the harsh winter elements pose a severe threat to your landscape. While you are bundled up inside, your trees and shrubs are left exposed to freezing temperatures, biting winds, and frozen soil. This intense exposure often leads to winter desiccation—a condition where plants lose moisture faster than they can replace it.

You might not notice the damage until spring arrives. As the weather warms, the leaves on your favorite boxwoods or the needles on your white pines may suddenly turn a brittle, reddish-brown. This winter burn isn’t just an unsightly nuisance; it is a serious stressor that can cause long-term damage to the structural health of your plants.

Understanding how the cold affects your landscaping is crucial for maintaining a healthy, vibrant yard. Fortunately, you can take proactive steps to defend your greenery. One of the most effective tools in your winter tree care arsenal is the use of specialized protective coatings.

Call 317-348-0811 to Learn More About Anti-Desiccant Sprays for Trees

What are Anti-Desiccant Sprays for Trees?

Anti-desiccant sprays are specialized protective coatings applied to plant foliage to prevent excessive moisture loss during the harsh winter months. Technically, you might hear the terms “anti-desiccant” and “anti-transpirant” used interchangeably. An anti-desiccant prevents the drying out of plant tissues, while an anti-transpirant limits transpiration—the natural process where water is released from tiny openings in the leaf surfaces. By limiting transpiration, these sprays effectively prevent desiccation.

Most products on the market use natural pine oil polymers or similar compounds. When sprayed onto the leaves and needles of susceptible plants, the liquid dries to form a clear, flexible film. This barrier is thin enough to allow the plant to continue normal respiration and photosynthesis, but robust enough to trap vital water inside the cellular structure.

How Do Anti-Desiccants Protect Trees in Winter?

These sprays protect trees by forming a clear, flexible waxy barrier over the microscopic openings in leaves and needles, locking in essential moisture when roots cannot absorb water from frozen soil.

During the growing season, a plant easily replaces the water it loses through its leaves by pulling moisture up through its root system. Winter disrupts this vital cycle. When the ground freezes, the roots are entirely cut off from their water supply. At the same time, warm, sunny winter days and dry, harsh winds continue to pull moisture out of the exposed foliage.

When the rate of water loss exceeds the water available, the plant tissues dry out and die. Anti-desiccant sprays act as a crucial shield against this environmental stress. By coating the foliage, the spray significantly slows the evaporation process. Wind gliding over the leaves will no longer pull as much moisture away, allowing the plant to survive on its stored water reserves until the spring thaw arrives and the roots can function normally again.

Which Trees Benefit Most From Winter Protection?

Broadleaf evergreens and specific conifers benefit the most from winter protection because they hold their foliage all year and continuously lose moisture. Deciduous trees shed their leaves in the fall, naturally minimizing their water loss during the coldest months. Evergreens, however, retain their greenery, making them highly vulnerable to winter winds and sun.

If you are evaluating your property for winter care, prioritize these highly susceptible plants:

  • Broadleaf evergreens: Boxwoods, hollies, azaleas, mahonia, and rhododendrons are notorious for suffering severe winter burn.
  • Conifers: Arborvitae, cedar, cypress, juniper, and white pine frequently show directional browning on the sides exposed to prevailing winds.
  • Tender stems: Rose canes and hydrangea stems can also benefit from a protective coating to prevent dieback.

Site selection for trees also plays a role. Evergreens planted in highly exposed areas, or those facing a south or west brick wall that radiates heat, will lose moisture even faster and are prime candidates for anti-desiccant applications.

When is the Best Time to Apply Anti-Desiccant Spray?

The best time to apply anti-desiccant spray is in late fall or early winter, typically late November or December, after the plant has gone completely dormant. Timing is everything when it comes to winter tree protection.

Applying the spray too early in the autumn can actually cause severe damage. As temperatures begin to drop, plants naturally move water from their foliage down into their root systems to prepare for winter. If you coat the leaves before this shift occurs, a high volume of water gets trapped in the foliage. When freezing temperatures hit, that trapped water expands, rupturing the plant cells and causing irreversible destruction.

Once the plants are fully dormant, you must wait for the right weather conditions. Apply the spray on a dry day when temperatures are resting comfortably between 40 and 50 degrees Fahrenheit. The temperature must remain above freezing for at least three to four hours after application to give the polymer coating enough time to completely dry and set. Ensure there is no rain in the immediate forecast, as precipitation will wash the product away before it cures.

Are Anti-Desiccants Safe for All Plants?

No, anti-desiccants are not safe for all plants and can actually damage certain species, particularly blue conifers and specific evergreens depending on the product used. Always read the label of any product before spraying it across your yard. Because these sprays are often oil-based, they can strip the natural waxy coating off of certain trees.

Colorado blue spruce is a prime example. Spraying a blue spruce will strip away the wax that gives the tree its characteristic blue color, turning the needles a dull green. While new growth in the spring will emerge blue, the existing damaged needles will not recover their unique hue.

Furthermore, different commercial products have unique chemical makeups. Certain anti-transpirants are strictly prohibited for use on arborvitae, juniper, or cedar due to adverse reactions. Checking the manufacturer’s restrictions will save you from accidentally harming the very plants you intend to protect.

Securing Long-Term Health for Your Landscape

Winter injury is an unfortunate reality, but it is one you can actively manage. By understanding how the cold affects your evergreens and utilizing protective measures like anti-desiccant sprays, you give your landscape a fighting chance against freezing temperatures and drying winds. Proper watering, strategic planting, and timely winter protection all work together to ensure your property remains beautiful and resilient year after year.

Maintaining a pristine, healthy landscape requires year-round dedication. If you need expert assistance preparing your Indianapolis property for the changing seasons, our team is here to help. We provide professional routine tree services, including precision trimming, structural pruning, and safe tree removal. Contact us today to schedule your consultation and give your landscape the professional care it deserves.

Call Now for a Free Quote

Related Post: Why Heavy Snow is a Silent Killer for Young Trees

How to Transplant a Tree in Spring: Expert Guide

TL;DR: Spring transplanting gives trees the best chance at survival by moving them during dormancy before new growth begins. Success requires proper timing (November–February in most regions), correct root ball sizing (8–12 inches wide per inch of trunk diameter for small trees), careful digging techniques, and consistent watering during the establishment period.

Key Takeaways:

  • Transplant during dormancy (late fall through early spring) when trees aren’t sustaining active canopy growth
  • Dig a saucer-shaped hole 3 times wider than the root ball with sloping sides
  • Position the root flare at or slightly above ground level to prevent settling issues
  • Water deeply and regularly for 1–2 years while roots establish
  • Small trees (under 2 inches trunk diameter) can be DIY projects; larger specimens require professional equipment

Table of Contents:

  1. Why Transplant Trees in the Spring?
  2. Preparing Your Tree for the Move
  3. Step-by-Step Guide to Transplanting
  4. Common Mistakes to Avoid
  5. Frequently Asked Questions
  6. Quick Recap
  7. Professional Tree Services in Indianapolis
Call 317-348-0811 for a Tree Service Estimate in Indianapolis

Why Transplant Trees in the Spring?

Spring transplanting leverages dormancy to minimize stress and maximize survival rates. Moving a tree while it’s dormant—before buds expand and leaves emerge—gives it the strongest foundation for recovery. During dormancy, trees aren’t expending energy to sustain a canopy, and their food reserves are at peak levels. This timing allows roots to establish in their new location before summer heat arrives.

The optimal transplanting window runs from November through February in most regions, though local climate variations apply. Avoid transplanting when air temperatures exceed 80°F or when the ground is frozen. Trees moved during this dormant period have several months to develop new roots before facing the stress of summer drought and heat.

Early spring planting also means roots can take advantage of natural spring moisture. As temperatures warm and rainfall increases, newly transplanted trees receive the water they need without excessive irrigation demands.

Preparing Your Tree for the Move

Successful transplanting starts days before you dig, with proper site selection and tree assessment.

Call Before You Dig

Contact 811 or visit call811.com at least 2–3 days before beginning work. This free service locates underground utilities—gas lines, electrical cables, water pipes—preventing dangerous and costly accidents during excavation.

Calculate Root Ball Size

The trunk diameter determines how large a root ball you’ll need to preserve. Measure trunk diameter 4 feet from the ground: wrap measuring tape around the trunk, note the circumference in inches, then divide by 3.14 (pi).

For small trees (2 inches diameter or less), the root ball width should be 8–12 inches for each inch of trunk diameter. A tree with a 1.5-inch diameter needs a root ball 12–18 inches wide.

Water Thoroughly

Hydrate the tree 1–2 days before transplanting. Moist soil holds together better during the move, reducing root damage and making the root ball easier to handle.

Prepare the New Location

Dig the new planting hole before removing the tree from its current spot. This minimizes the time roots are exposed to air and stress. The hole should be 2–3 times the width of the root ball but only 1–2 inches deeper than the root ball height.

Step-by-Step Guide to Transplanting

Follow these detailed instructions for a smooth transition to the tree’s new home.

Step 1: Dig the Planting Saucer

Create a wide, shallow saucer rather than a deep pit. The saucer should be 3 times wider than the root ball with gently sloping sides. This shape gives developing roots loose, friable soil to penetrate as they spread horizontally through the upper 6–12 inches of soil.

Dig only deep enough so the root flare—the subtle curve where main roots enter the soil—sits at or slightly above ground level. Planting too deep is one of the most common and damaging mistakes in tree transplanting.

Roughen the sides of the saucer with your shovel to break up any compaction. The bottom should remain undisturbed or firmly packed to prevent the root ball from settling below grade.

Step 2: Create the Root Ball

Using a sharp spade, dig a trench around the tree in a circle matching your calculated root ball width. Cut straight down 1–2 feet, then angle inward to round out the bottom of the root ball.

Work carefully to keep the root ball intact. For containerized trees, cutting the bottom off the container before placing the tree helps maintain ball integrity. For balled-and-burlapped stock, keep wrapping in place during the move to prevent damage.

Step 3: Wrap and Secure

Cut a piece of burlap large enough to cover the entire root ball. Carefully tip the root ball to one side, slide the burlap underneath, then roll the ball onto the burlap. Wrap completely and secure with twine.

This wrapping protects the root ball during transport and handling. Never lift a tree by its trunk—always support it from underneath the root ball.

Step 4: Position in the Saucer

Lower the tree gently into the prepared saucer, positioning it so the root flare is at or no more than 1–2 inches above ground level. Step back and check from multiple angles to ensure the trunk stands perfectly vertical.

For balled-and-burlapped trees, remove at least the top one-third of wire basket and burlap after positioning. Remove all synthetic burlap or plastic completely, as these materials don’t biodegrade and can restrict root development.

Step 5: Backfill and Settle

Hold the trunk steady while adding native soil around the root ball. Fill in layers, tamping lightly or watering between layers to eliminate air pockets without creating excessive compaction.

Use the soil excavated from the saucer for backfill. While amending soil can help in some situations, creating a transition zone is better than completely backfilling with amendments, which can cause moisture gradients and confine roots to the planting hole.

Water slowly and thoroughly after backfilling to settle soil around roots and provide immediate hydration.

Step 6: Mulch Properly

Apply 1–1.5 inches of organic mulch in a ring extending at least 4 feet from the trunk. Keep mulch at least 4 inches away from the root flare to prevent moisture buildup against the bark.

Wood chips and composted materials work well. Avoid “volcano” mulching—piling mulch against the trunk creates habitat for pests and fungal diseases.

Step 7: Stake Only If Necessary

Most newly transplanted trees don’t need staking. Unstaked trees develop stronger, more wind-firm roots and appropriate trunk taper by swaying naturally in the breeze.

Stake only if the tree has a very light root ball, sits on a hillside, or faces persistent wind or foot traffic. Use 2–3 stakes with wide, flexible ties placed no higher than one-third up the trunk. Allow “wiggle room” so the top can sway. Remove stakes after one year to prevent them from interfering with growth.

Common Mistakes to Avoid

These frequent errors can compromise transplant success and long-term tree health.

Planting Too Deep

When the root flare sits below grade, roots suffocate from lack of oxygen and bark remains too moist. Always position the flare at or slightly above ground level, accounting for settling.

Inadequate Root Ball Size

Removing too little soil with the roots reduces the tree’s ability to absorb water and nutrients. Follow the 8–12 inches per trunk diameter guideline for small trees. Larger specimens require professional assessment.

Compacted Planting Hole

Using an auger or digging a narrow pit creates compacted walls that roots struggle to penetrate. Always dig a wide, saucer-shaped hole with roughened sides.

Overwatering or Underwatering

Newly transplanted trees need consistent moisture but not saturation. Use a stiff wire to check soil moisture: dry soil resists penetration, while muddy wire indicates oversaturation. Adjust watering frequency based on weather, soil type, and drainage.

Planting at the Wrong Time

Transplanting during active growth or extreme heat increases stress and mortality risk. Stick to the dormant season window, and avoid planting when temperatures exceed 80°F.

Leaving Synthetic Materials

Synthetic burlap, plastic, and wire baskets that aren’t removed can girdle roots and destabilize trees as they grow. Remove all synthetic materials and at least the top third of natural burlap and wire.

Excessive Pruning

Trees don’t need pruning to “balance” top growth with roots. Restrict pruning to diseased, damaged, or dead branches only.

Frequently Asked Questions

When is the absolute best time to transplant trees?

The optimal window is during dormancy, from late fall through early spring before bud break. In most regions, November through February offers the best conditions. This timing allows roots to establish before summer stress while the tree isn’t sustaining active canopy growth.

How do I know if my tree is too large to transplant myself?

Trees with trunks larger than 2 inches in diameter should be transplanted by professionals. Large root balls can weigh hundreds of pounds and require specialized equipment like tree spades. Attempting to move large trees without proper tools risks severe root damage and personal injury.

How much water does a newly transplanted tree need?

Apply 1–1.5 gallons of water per inch of trunk diameter at each watering. A tree with a 1-inch diameter trunk needs at least 1 gallon. Water at least twice weekly for the first 1–2 years, increasing frequency during hot weather or in sandy soil. Larger containerized trees may require daily watering. Up to 10 gallons per diameter inch per week may be needed during peak summer heat.

Should I fertilize my tree after transplanting?

Adding fertilizer at planting typically doesn’t speed establishment. Wait until the next growing season, then consider a small amount of slow-release fertilizer (≥50% nitrogen as water-insoluble) only if the tree shows signs of stress or was planted in poor soil. Soil testing before planting provides better guidance than routine fertilization.

Quick Recap:

  • Time it right: Transplant during dormancy (November–February) when trees aren’t sustaining active growth
  • Call 811: Locate underground utilities before digging to prevent accidents
  • Size matters: Calculate proper root ball dimensions—8–12 inches wide per inch of trunk diameter for small trees
  • Dig wide, not deep: Create a saucer-shaped hole 3 times wider than the root ball with sloping sides
  • Position carefully: Place root flare at or slightly above ground level to prevent suffocation
  • Remove containers completely: Cut away all synthetic materials and top third of natural burlap/wire
  • Water thoroughly: Apply 1–1.5 gallons per trunk diameter inch at each watering, twice weekly minimum
  • Mulch wisely: Apply 1–1.5 inches of organic mulch in a 4-foot radius, keeping it 4 inches from the trunk
  • Skip unnecessary staking: Most trees establish better without support unless facing specific challenges
  • Know your limits: Trees over 2 inches in diameter require professional transplanting services

Conclusion

Proper tree planting and care is an investment in the health of your landscape and the environment. By following these guidelines—choosing the right tree, preparing the site effectively, and nurturing the tree after planting—you can ensure strong establishment and long-term growth.

Remember, trees not only beautify our surroundings but also provide shade, reduce energy costs, and improve air quality. Your efforts today will create lasting benefits for generations to come. Nurture your trees with care, and they will reward you with unmatched beauty and ecological value.

If you’re looking for expert assistance with tree planting, care, or maintenance in the Indianapolis area, our professional tree services are here to help. Contact us today to schedule a consultation and ensure that your trees thrive for years to come!

Call to Book Service

Related Post: Digging Deep into Green Living with Backyard Tree Planting

Safest Fixes for a Dangerous Tree That is Dropping Large Limbs

Hearing the sudden crack of a tree limb outside your window is a sound that instantly triggers alarm. A backyard sanctuary can quickly become a hazard zone when large branches start to fail. Whether it’s a result of a storm, disease, or the mysterious “summer branch drop,” addressing falling limbs is critical for protecting your home and family.

This guide explores why trees shed heavy branches, how to spot the warning signs, and the safest solutions for managing these risks.

TL;DR and Key Takeaways:

  • Sudden Failure: Healthy-looking trees can drop limbs on hot, calm summer days due to moisture stress.
  • Warning Signs: Look for deep cracks, fungal growth (conks), and “included bark” at branch unions.
  • Professional Assessment: An ISA Certified Arborist can determine if the tree needs pruning, cabling, or full removal.
  • Safety First: DIY removal of large limbs is statistically dangerous; falls and electrocution are major risks.

Table of Contents:

  1. Why is my tree dropping large limbs?
  2. What are the signs a tree branch is about to fall?
  3. Can you save a tree that is dropping branches?
  4. Is it safe to remove large tree limbs yourself?
  5. Frequently Asked Questions
  6. Quick Recap
  7. Indianapolis Tree Removal Service
Call 317-348-0811 for Affordable Tree Removal in Indianapolis

Why Is My Tree Dropping Large Limbs?

Trees typically drop large limbs due to structural defects, disease, or a phenomenon known as “summer branch drop.” While storm damage is an obvious cause, homeowners are often baffled when a massive limb falls on a calm, sunny afternoon. This is often called Summer Branch Drop (or Sudden Limb Drop).

According to the University of Florida and Arkansas Cooperative Extension Service, this tends to happen on hot, still days. The theory is that trees draw up immense amounts of water to combat the heat, increasing the water weight in the limb until the wood fibers simply snap under the tension.

Other common causes include:

  • Structural Defects: Poor branch architecture, such as V-shaped unions where bark gets trapped between stems (included bark), creates weak points that eventually fail.
  • Pests and Disease: Borers (like the Emerald Ash Borer) or fungal infections weaken the wood from the inside out, making limbs brittle.
  • Root Issues: If the root system is compromised by construction compaction or rot, the tree may shed branches as it struggles to transport nutrients.

What Are the Signs a Tree Branch is About to Fall?

Visible warning signs include deep cracks, fungal conks, deadwood, and codominant stems. Inspecting your trees regularly—especially after storms—can help you catch these defects before gravity takes over.

Purdue Extension identifies several key indicators of potential failure:

  • Cracks and Splits: Look for visible cracks where a branch meets the trunk. Any separation in the wood indicates the load-bearing capacity is failing.
  • Fungal Conks (Mushrooms): If you see shelf-like mushrooms growing on the bark, it is a strong sign of internal decay. These fungi feed on the wood, leaving it hollow or spongy.
  • Deadwood: Branches that are missing bark or have no leaves during the growing season are dead. They are dry, brittle, and guaranteed to fall eventually.
  • Included Bark: In a “V-shaped” crotch between two stems, bark can roll inward. This prevents the branches from connecting physically, creating a very weak attachment point.
  • Cavities: Large holes or hollows, especially nesting holes for birds, can indicate that the heartwood has rotted away.

Can You Save a Tree That is Dropping Branches?

Yes, many trees can be saved through corrective pruning, cabling, or bracing, provided the main trunk is sound. Dropping a limb doesn’t automatically mean the whole tree must be cut down. The solution depends on the severity of the defect and the “target” (what would be hit if it fell).

  • Corrective Pruning: An ISA Certified tree care professional can remove dead or weak branches, reducing the weight on the tree’s structure. This “crown cleaning” minimizes the risk of future drops.
  • Cabling and Bracing: For trees with structural weaknesses but high value (like a historic oak), professionals can install high-strength cables or steel rods. These support the weak limbs and limit their movement during high winds.
  • Risk Assessment: If the tree is hollow or the rot is extensive, removal may be the only safe option. A professional will perform a tree risk assessment to see if the tree poses an unacceptable danger to people or property.

Is It Safe to Remove Large Tree Limbs Yourself?

No, removing large tree limbs without professional training and equipment is extremely dangerous and often fatal. It might look simple from the ground, but tree work is one of the most hazardous professions in the world. The National Institute for Occupational Safety and Health (NIOSH) reports that falls and electrocutions are leading causes of death in tree trimming.

Here is why DIY is a bad idea for large limbs:

  • Gravity is unpredictable: A cut branch can swing back, twist, or bounce in unexpected ways, knocking the ladder out from under you or pinning you against the trunk.
  • Electrical Hazards: You don’t have to touch a power line to be electrocuted. Electricity can arc from a line to your pole saw or ladder. Professionals maintain strict “minimum approach distances” that homeowners are often unaware of.
  • Equipment Danger: Chainsaws are unforgiving. Using one while balanced on a ladder or up in a tree requires specialized skills and fall-protection gear (saddles, ropes, and harnesses) that most homeowners do not own.

Frequently Asked Questions

Why did a healthy branch fall off my tree?

This is likely “Summer Branch Drop.” It occurs when high temperatures and humidity cause water pressure to build up inside the limb, snapping the wood fibers even if the wood appears healthy and rot-free.

How often should I have my trees inspected?

Purdue Extension recommends a professional inspection every 1 to 5 years, depending on the age of the tree and its proximity to your house or driveway. You should also inspect them immediately after severe weather.

Can a tree heal a broken limb wound?

Trees do not “heal” in the way humans do; they “seal.” They grow specialized scar tissue (callus wood) over the wound to wall off decay. A clean cut made by a professional helps the tree seal effectively, whereas a jagged break from a fallen limb invites rot.

Quick Recap:

  • Don’t ignore the signs: Cracks, mushrooms, and V-shaped unions are red flags.
  • Summer isn’t safe: Perfectly healthy limbs can snap on hot, still days.
  • Keep your distance: If a limb looks shaky, move patio furniture and cars out of the “target zone.”
  • Call a pro: Chainsaws and ladders are a deadly mix for untrained homeowners.

Final Thoughts

Trees add immense value and beauty to our properties, but they are large, living organisms that react to their environment in powerful ways. Respecting their size and weight means acknowledging when a job is too big for a Saturday afternoon project. By spotting the warning signs early and relying on professional expertise, you can enjoy your canopy without fearing what might fall from it.

Need help with a dangerous tree? If you are worried about a hanging limb or a tree that looks unstable, don’t wait for the next storm. For professional tree removal and tree trimming in Indianapolis, contact us today to secure your property.

Call to Book Service

Related Post: Managing Dead Tree Limbs: A Complete Safety Guide

Unveiling Root Stress: Identification, Causes, and Solutions

TL;DR: Root stress is a silent killer of landscape trees, often caused by invisible issues like soil compaction, deep planting, or improper watering. Because roots are hidden underground, symptoms often appear in the leaves or branches when damage is already advanced. Recognizing early signs—like early fall color or canopy dieback—and addressing the root cause can save your tree from decline.

Key Takeaways:

  • Look Up to See Down: Symptoms of root stress often manifest in the canopy, including yellowing leaves, scorched edges, and dieback from the top down.
  • Common Culprits: The most frequent causes are human-made: “mulch volcanoes,” planting too deep, and soil compaction from construction or foot traffic.
  • Water Wisely: Overwatering is just as dangerous as drought. Roots need oxygen as much as they need water.
  • Fixable Issues: Solutions range from simple mulching adjustments to professional air spading, but severe cases may require removal.

Table of Contents:

  • What is Root Stress?
  • How Can I Identify Root Stress?
  • What Causes Root Stress?
  • How Can I Fix Root Stress?
  • Frequently Asked Questions
  • Quick Recap
  • Conclusion

Your trees are stoic giants. They weather storms, provide shade, and anchor your landscape. But beneath the surface, a delicate struggle might be taking place. While we often focus on the leaves and branches we can see, a tree’s health is dictated by the “hidden half” underground.

When roots can’t function properly, the entire tree suffers. This condition, known as root stress, acts like a slow-moving restriction on the tree’s lifeline. It cuts off the essential flow of water and nutrients, leaving the tree vulnerable to pests, diseases, and environmental shifts. Unfortunately, because the problem lies buried in the soil, many homeowners don’t notice something is wrong until the damage is severe.

Understanding the subtle signals your tree sends is the first step in restoring its vitality. By learning to read the leaves and inspect the trunk, you can uncover what is happening below ground and take action before it’s too late.

Call 317-348-0811 for Professional Tree Removal Service in Indianapolis

What is Root Stress?

Root stress is a broad term for any condition that inhibits a tree’s root system from growing, absorbing water, or taking in oxygen.

Think of roots as the engine of the tree. If the engine is choked or starved of fuel, the car won’t run, no matter how shiny the paint is. Healthy roots require a balance of four things: water, nutrients, physical space to grow, and—crucially—oxygen.

When soil conditions prevent roots from accessing these essentials, the tree enters a state of physiological stress. This weakens the tree’s natural defenses, making it an easy target for secondary invaders like borers or fungal diseases.

How Can I Identify Root Stress?

Since you can’t easily dig up a mature tree to check its roots, you have to look for clues above ground. The canopy acts as a mirror for the root system; if the roots are unhappy, the leaves will tell you.

Watch for these common symptoms:

  • Canopy Dieback: This is often the most alarming sign. You might notice dead branches at the very top of the tree or on the outer tips. This happens because the struggling root system can no longer pump water and nutrients to the furthest points of the tree.
  • Leaf Scorch: If the edges of the leaves look brown, crispy, or “burnt,” especially during summer, it usually means the roots aren’t supplying enough water to keep up with evaporation.
  • Chlorosis (Yellowing): When roots are suffocated by compacted or wet soil, they cannot absorb nutrients like iron or manganese. This results in leaves that are pale green or yellow while the veins remain green.
  • Early Fall Color: If your maple turns red in August while the neighbors’ trees are still green, it isn’t just eager for autumn. Premature color change is a classic distress signal.
  • Suckers and Water Sprouts: A stressed tree often tries to save itself by growing new shoots rapidly from the base of the trunk (suckers) or along the main branches (water sprouts).
  • Visible Root Issues: Look at the base of the trunk. If you see roots wrapping tightly around the trunk (girdling roots) or if the trunk looks like a telephone pole going straight into the ground with no flare, the roots are likely in trouble.

What Causes Root Stress?

Most root stress is abiotic, meaning it is caused by non-living environmental factors rather than pests or bacteria. Surprisingly, many of these issues are human-made.

Is your soil compacted?

Healthy soil is about 50% pore space—tiny pockets filled with air and water. When heavy machinery, cars, or even constant foot traffic compress the soil, those pockets are crushed. This is called soil compaction.

  • The result: Roots suffocate because they lack oxygen. Water runs off the surface instead of soaking in, leading to drought stress even when it rains.

Are you “killing with kindness” (Mulch Volcanoes)?

One of the most common landscape crimes is the “mulch volcano”—piling mulch high against the tree trunk.

  • The result: Tree bark is meant to be dry, not wet. Piling mulch against it causes the bark to rot and encourages roots to grow into the mulch rather than the soil. It can also suffocate the buried roots below.

Was the tree planted too deep?

If a tree is planted too deep, the root flare (the wide part where trunk meets roots) is buried.

  • The result: This suffocates the phloem cells at the base of the trunk and can lead to girdling roots—roots that grow in a circle and eventually strangle the tree.

Is the drainage poor?

Trees need water, but they don’t want wet feet. If water sits in the planting hole because of heavy clay soil or overwatering, the oxygen in the soil is replaced by water.

  • The result: Root rot. The roots literally decay and die, preventing them from absorbing the very water they are drowning in.

How Can I Fix Root Stress?

If you catch it early, root stress can often be managed or reversed. The goal is to improve the soil environment so new roots can grow.

1. Correct Your Mulching

If your tree looks like it’s erupting from a mountain of mulch, fix it immediately.

  • The fix: Pull the mulch back from the trunk. You should be able to see the root flare. Spread the mulch in a “donut” shape, 2 to 4 inches deep, extending as far out to the drip line (the edge of the branches) as possible. This mimics the forest floor, keeping soil cool and moist without suffocating the trunk.

2. Alleviate Compaction

For compacted soil, you need to reintroduce air.

  • The fix: Vertical mulching or core aeration can help. For severe cases, professional arborists use an “air spade”—a tool that uses compressed air to blast apart compacted soil without damaging roots. They then mix in organic matter to keep the soil loose.

3. Water Deeply and Infrequently

Stop sprinkling your trees every day for 10 minutes. This encourages shallow, weak roots.

  • The fix: Water deeply so the moisture penetrates 6 to 9 inches down. Then, let the soil dry out slightly before watering again. This encourages roots to grow deep to find water, making the tree more resilient.

4. Excavate the Root Collar

If your tree looks like a telephone pole (no flare visible at the bottom), it is buried too deep.

  • The fix: Carefully remove the soil and mulch from around the base of the trunk until you find the first main structural roots. If you find small roots wrapping around the trunk (girdling roots), they may need to be carefully cut. Note: For large trees, this is a delicate task best left to professionals.

Frequently Asked Questions

Can a tree recover from root stress?

Yes, often trees can recover if the stress is identified early. However, recovery is slow. Trees grow on a different timeline than flowers or vegetables. It may take a year or two of proper care (mulching, watering, soil correction) before you see significant canopy improvement.

How do I know if it’s root rot or drought?

Ironically, the symptoms look the same: yellowing leaves and wilting. The difference is in the soil. Dig a small hole 6 inches deep near the tree. If the soil is sopping wet and smells like rotten eggs, it’s root rot/overwatering. If it’s bone dry and hard, it’s drought.

Is hammering spikes into the soil good for aeration?

Generally, no. Simply punching holes with a spike compresses the soil around the hole, making compaction worse in those areas. Removing soil cores (plugs) or using air tools is much more effective.

Quick Recap

  • Roots need air: Compacted soil kills roots by suffocating them.
  • Watch the leaves: Top-down dieback and early color changes are SOS signals.
  • Mulch correctly: Keep it off the trunk (donut shape), not piled high (volcano).
  • Check the flare: You should see the trunk widen at the base. If not, excavate.
  • Water deep: Soak the root zone, then let it breathe.

In Summary

Trees are valuable assets that increase property value and quality of life. While they are incredibly resilient, they have their limits. By paying attention to the soil beneath them and avoiding common pitfalls like over-mulching or deep planting, you can help your trees thrive for decades.

However, sometimes damage to the root system is too extensive to reverse. If your tree shows severe dieback, lean, or signs of instability, it may pose a safety risk to your home and family.

Need help with a struggling tree? If your tree is beyond saving or poses a danger to your property, don’t wait for a storm to bring it down. Contact Us Today for a Professional Tree Removal Service in Indianapolis. Our experts can assess the health of your trees and safely remove those that are no longer viable.

Call Now to Book Service

Related Post: Spotting the Symptoms: How to Tell If Your Tree Is Sick

What is Sunscald? How to Protect Your Trees from Winter Damage

Winter sun might seem less threatening than summer’s blazing heat, but for your trees, it can be surprisingly destructive. Sunscald—a form of tree damage caused by temperature fluctuations and intense sunlight—affects thousands of trees across the Midwest each year, often leaving homeowners puzzled by the cracked, discolored bark they discover come spring.

Sunscald occurs when bark tissue is damaged by rapid temperature changes, typically during winter months when sunny days are followed by freezing nights. This condition primarily affects the south and southwest sides of tree trunks, where direct sunlight warms the bark during the day, only to have temperatures plummet after sunset. The resulting expansion and contraction of bark tissue can cause splitting, cracking, and permanent damage that compromises your tree’s health and longevity.

For Midwest homeowners, understanding sunscald is essential for maintaining healthy trees. The region’s variable winter weather—with its sudden temperature swings and bright, reflective snow cover—creates perfect conditions for this type of tree damage. Young fruit trees, maples, and other thin-barked species are particularly vulnerable, making prevention and early treatment crucial for protecting your landscape investment.

Call 317-348-0811 for Professional Winter Tree Care in Indianapolis

How to Identify Sunscald Damage on Your Trees

Recognizing sunscald damage early can make the difference between a tree that recovers fully and one that struggles for years. The most obvious signs appear on the trunk’s south and southwest faces, where winter sun exposure is most intense.

Look for vertical cracks or splits in the bark that may range from hairline fractures to gaps several inches wide. The bark around these areas often appears discolored—turning brown, black, or even orange—and may begin to peel away from the trunk. In severe cases, you might notice loose bark that can be easily pulled away, revealing the lighter-colored wood underneath.

Sunscald damage typically becomes most apparent in late winter or early spring as temperatures begin to stabilize. During your tree inspections, pay special attention to young trees and those with smooth, thin bark. Maple trees, fruit trees like apple and cherry, and newly planted specimens are among the most susceptible to this type of damage.

The affected areas may also show signs of secondary problems, such as insect infestations or fungal infections that take advantage of the compromised bark. Canker diseases often develop in sunscalded areas, creating sunken, discolored patches that can girdle branches or even the main trunk if left untreated.

Understanding the Causes of Tree Sunscald

Sunscald develops through a process that’s more complex than simple sun damage. During winter days, direct sunlight can warm tree bark to temperatures well above the ambient air temperature—sometimes 20 to 30 degrees higher. This warming activates dormant cells in the bark and cambium layer, the tree’s growth tissue just beneath the bark.

When the sun sets or disappears behind clouds, temperatures drop rapidly, often falling below freezing within hours. These newly activated cells, no longer dormant and therefore less cold-hardy, become damaged or killed by the sudden temperature change. The repeated cycle of warming and freezing causes the bark to crack and split.

Snow cover can amplify this problem by reflecting additional sunlight onto tree trunks, intensifying the heating effect. The Midwest’s continental climate, with its clear winter skies and dramatic temperature swings, creates ideal conditions for sunscald development. Urban environments can worsen the situation, as pavement and buildings reflect additional heat and light toward nearby trees.

Certain factors increase a tree’s susceptibility to sunscald. Young trees with thin, smooth bark lack the protective thick outer bark of mature specimens. Trees that have been heavily pruned or transplanted recently may also be more vulnerable, as stress can compromise their natural defense mechanisms. Additionally, trees planted in exposed locations without natural windbreaks or shade protection face higher risks.

Request Professional Tree Service in Indianapolis Today

Practical Prevention Strategies for Midwest Trees

Preventing sunscald is far more effective than treating damaged trees after the fact. The most reliable protection method involves wrapping vulnerable tree trunks with tree wrap or paper tree guards before winter arrives. Begin wrapping at the base of the tree and spiral upward, covering the trunk to the first major branches. Remove the wrapping in early spring to prevent moisture buildup and pest problems.

Tree selection plays a crucial role in long-term sunscald prevention. When choosing trees for your Midwest landscape, consider species with naturally thick bark or those adapted to harsh winter conditions. Consult with local experts like those at Allisonville Nursery, who can recommend varieties that perform well in your specific microclimate and soil conditions.

Proper planting location significantly impacts a tree’s vulnerability to sunscald. When possible, plant susceptible species where they’ll receive some protection from intense afternoon sun—perhaps on the north or east side of buildings or existing large trees. However, ensure they still receive adequate sunlight for healthy growth.

Maintaining overall tree health strengthens your trees’ natural resistance to sunscald and other stressors. Proper watering throughout the growing season, especially during dry periods, helps trees enter winter in optimal condition. Apply a 2- to 3-inch layer of organic mulch around the tree’s base, keeping it several inches away from the trunk to prevent moisture problems and pest issues.

Regular tree inspections during fall and winter allow you to monitor for early signs of damage and adjust protection measures as needed. Young trees require particular attention during their first few years after planting, as they’re establishing their root systems and building natural defenses.

Treatment and Recovery for Sunscalded Trees

When you discover sunscald damage on your trees, prompt and proper treatment can help minimize long-term effects and support recovery. Begin by carefully removing any loose or dead bark from the affected area using clean, sharp tools. Avoid cutting into healthy tissue, as this can create additional wounds and stress for the tree.

After cleaning the damaged area, apply a tree wound dressing or sealant to protect the exposed wood from pests and diseases. While trees naturally compartmentalize wounds, protecting large sunscald injuries can prevent secondary problems that might compromise the tree’s recovery.

Support your tree’s recovery through proper fertilizing with a balanced fertilizer that provides essential nutrients for new growth. Focus on maintaining consistent soil moisture through adequate watering, especially during dry periods when the tree is working to heal and establish new bark tissue.

Pest and disease control becomes particularly important for sunscalded trees, as the damaged areas can attract insects and provide entry points for pathogens. Monitor treated areas regularly for signs of infestation or infection, and take appropriate control measures promptly if problems develop.

For extensive damage or valuable trees, consulting with a certified arborist provides access to professional assessment and tailored treatment plans. Arborists can evaluate whether the damage threatens the tree’s structural integrity and recommend appropriate interventions that might not be obvious to homeowners.

Recovery from sunscald requires patience, as trees heal slowly and may take several growing seasons to fully compartmentalize large wounds. Continue protective measures during subsequent winters, as previously damaged trees may be more susceptible to additional injury.

Protecting Your Trees for Years to Come

Sunscald represents one of the most preventable forms of tree damage, yet it continues to affect countless trees across the Midwest each winter. By understanding the causes, recognizing the symptoms, and implementing proper prevention strategies, you can protect your trees from this potentially serious condition.

Remember that tree care is an ongoing investment in your property’s beauty and value. Regular inspections, proper species selection, and proactive protection measures will help ensure your trees remain healthy and vibrant for generations. When in doubt, don’t hesitate to seek professional guidance—a consultation with a certified arborist or tree service company can provide personalized recommendations for your specific trees and growing conditions.

Take action now to assess your trees’ vulnerability to winter sunscald and implement protection strategies. Schedule routine tree service with Timberland Tree Care to develop a comprehensive plan that addresses your landscape’s unique needs and protects your investment in healthy, beautiful trees.

Call to Book a Tree Inspection

Related Post: How to Care for Dormant Trees in the Winter Season